Showing posts with label Gardening. Show all posts

Friday, August 3, 2012

$0.05 seeds at Walgreens!


UPDATE: Walgreens stores are very independent. As in so independent that a store less than ten miles away will have the same seeds on clearance for $0.25. So keep your eyes peeled and don't be afraid to shop around :) Don't forget to check back often. Prices will always go down down down. They want to move the clearance items to make room for the new stock.

Yay! It's that time of year. Seed clearance. Oh boy oh boy oh boy. I tend to go overboard at this time of year pretending that next season I will have someone to swap seeds with. Um yeh. And I'm going to run away with Brad Pitt. And not Legends of the Fall Brad Pitt, but Meet Joe Black Brad Pitt :) Does this post have a point? Sure does: Check your local Walgreens for packets of seeds on clearance for $0.05. I found them in the clearance aisle. Everything from Cherry Tomatoes, Beefsteak Tomatoes, Cukes, Cosmos, Zinnias, Sunflower, Cabbage, Basil, Wildflower Mix, Morning Glory, to Cilantro and much more.

*I want to mention that just because the packet says packaged for 2012 doesn't mean they won't sprout next year.  I use old seeds every year. Only this year did my 5 year old Marigold seeds stick their noses up at me. So be it.

Sunday, May 27, 2012

Seasonal Sunday: Wisconsin USDA Plant Hardiness Zone Map

I was visiting the UW-Extension Cooperative Extension today trying to get up to date on local gardening and landscaping information. So many helpful articles there. It's always great to go local when seeking gardening and landscaping advice. My favorites are Earwig Control, Using Cover Crops and Green Manures in the Home Vegetable Garden, and Storing Fruits and Vegetables from the Home Garden. Beware of the image of the gigantic centipede on the front page. Really. It's enough to make one jump a little. Or a lot. Happy gardening!

Sunday, June 5, 2011

Seasonal Sunday: FREE seeds on your birthday!

Who doesn't love more presents on their birthday? If you sign up for Mike The Gardener's newsletter you will receive 2 packs of seeds for your birthday. EVERY YEAR! How cool is that? I love planting seeds and I love free stuff. Yay!

Monday, February 28, 2011

Seasonal Sunday: Time to plant those seeds outside!

Internet problems all weekend so again I am playing catch up. :(

Crazy blogger lady say what? Yup, time to plant seeds. OUTSIDE. I am not crazy. I don't think. And yes, it is time to plant your seeds outside in NE WI. Or Zone 5. Or whatever you want to call that there area outside you get your hands dirty in. That's my fave part of planting. Getting my hands all full of dirt. I've purchased many a pair of gardening gloves, but prefer the feel of the Earth on my hands and under my fingernails. Okay, maybe I am crazy....

Last year was my first attempt at Winter Sowing. Winter What?  Winter Sowing. Basically you plant your seeds in mini greenhouses made from (my other favorite part) reused containers. I like gallon milk jugs, but have used 2 L bottles and large yogurt containers. Set them out in the snow and wait for them to germinate. For real. Don't believe me? Read about my results and see actual pics here and here.

Last year I planted Organic Brandywine, Organic Bush Beans (Which turned out to be pole beans grr.), Organic Cucumbers, Organic Beefsteak and Organic Multi Colored Bell Peppers. I planted half indoors in seed trays and the other half outside. I was afraid all would fail outdoors so I had a back up plan ready. Little did I know that the only ones to fail outdoors would be the peppers and I'm not sure why. Indoors EVERYTHING failed. Everything died. I blame damping off and once it hits it's too late to fix it. When you plant everything outdoors in the first place there are way less complications because the seeds start out in their natural surroundings. There's no need to harden or even hardly water them. It's a breeze.

This year I planted pretty much the same. Used my free $25 worth of Garden's Alive products (if you haven't done so already you still have time to place an order) to get Sweet N Neat Tomatoes (a cherry variety, new to me), Organic Jalapeno, Organic Paris Island Cos Romaine Lettuce (new to me), Crimson Sweet Watermelon (new to me), Organic Chinese Sweet Pepper (similar to green bell pepper, new to me) and Delicious Tomatoes (high yield, new to me). I also planted some of my seeds that were left over from last year. Can't wait for my garden!! I will keep you updated on my Winter Sowing adventure. I'd love to swap Winter Sowing stories if you plant your seeds this way too. What are you planting this year?

Saturday, February 5, 2011

FREE gardening gloves and veggie seeds from Annie's Homegrown.

Collect two UPCs from any Annie's Homegrown or Naturals products and mail in this form to receive your FREE seeds and gloves. Awesome! You can select either adult or child size gloves too. We're big fans of Cheddar Bunnies in this house. Thanks Turning the Clock Back!

Wednesday, January 5, 2011

Check your mailbox! UPDATE: I used my coupon :)

UPDATE: I placed my order and paid $1.95 for 5 packs of organic seeds! :) See below to view my order summary. 
Did you get the latest Gardens Alive! catalog? I got mine and smack dab on the cover is a coupon for FREE $25 worth of product. No strings attached. They have switched it up in the past and made you purchase $25 to get $25 more free. Not this time!! Do the happy dance. So go pick out $17 worth of product and add $7.95 for shipping and it's all FREE! Or orders over $20 (up to $40) add $9.95, over $40 (up to $60) add $11.95, etc.etc. Sales tax needs to be added to IN and OH orders. Cannot ship to Hawaii or Canada. Sorry guys.  If you didn't get the coupon you can save $20 off an order of $40 through their website.

Sunday, October 17, 2010

How does your garden grow? Part 30: End of season gardening.

This is my final 'How does your garden grow?' post. I will continue to do a weekly seasonal post, but it won't be garden talk. It will be anything that pertains to the season. I have posted before about what the next steps you should be taking to get your yard, garden and houseplants in shape, but it's now or never as the ground will be frozen soon here in NEW.

It is time to let your Christmas Cactus dry out between watering. Also, place in a cooler spot than it has been in all summer. This will allow the flower buds to set properly in time for your guests to ooo and ahh.

Plant spring/fall flower bulbs now. If it seems like a huge chore you can put off the fall bulbs until spring, but make sure to take care of them as soon as you can work the ground. It is best to get them all done this fall for good root development.

The Brassicaceae family (cabbage, brussel sprouts and the like) do well after a light frost. You don't want them frozen, but the taste will be accentuated by a frost.

Fertilize your houseplants for the last time until Spring.

Dig up bulbs that need to dug up (dahlia, gladiolus, cannas, etc.).

Wait to add mulch for the winter until the ground has frozen.

After your Mums are spent mound up the dirt around the bottom and cut back stems. You can mulch after the ground has frozen.

Garlic should be already planted or planted soon.

I hope you enjoyed the series of gardening posts. It has been a great 30 weeks. I enjoyed sharing my knowledge along with learning quite a bit as I went along. Gardening is definitely one of my passions. I hope you continue on with me every Sunday as I bring to you a seasonal post that will include recipes, fun activities, decorating ideas and much much more.

Sunday, October 10, 2010

How does your garden grow? Part 29: Pumpkin Pumpkin Pumpkin and more Pumpkin!

I grew pumpkins in my garden this year. I made the mistake of growing two types. Maybe this wasn't a mistake, but something happened. I blame nature. The pumpkins I grew to cook and puree didn't grow into perfect little edible pumpkins. They sure were cute, but not edible by any means. Grr. My Long Island Cheese Pumpkins turned bright orange and they are supposed to be a tan kind of color. I'm not even going to attempt to cook one of those up. Here are my favorite pumpkin recipes anyway.

Pumpkin Bars with Cream Cheese Frosting

Go get it:

4 eggs

2 cups sugar
1 cup oil
1 3/4 cup pureed pumpkin or a 15oz can pumpkin
2 cups flour
2 tsp baking powder
1 tsp soda
3/4 tsp salt
1/2 tsp cinnamon
1/2 tsp cloves
1/2 tsp nutmeg
1 bag of dark chocolate chips

Frosting

3 oz cream cheese
3/4 stick margarine or butter
3 cups powdered sugar
1 tsp vanilla
1 T milk

Go make it:

1. Mix 1st four ingredients well and then add dry ingredients.
2. Stir in 1/2 cup nuts
3. Fold in chocolate chips.
4. Pour into greased jelly roll pan or for thicker bars a 9 x 13 pan. Bake approximately 25 minutes.
5. Cool then frost. After spreading on bars sprinkle with chopped nuts if desired.


Pumpkin Bread with Cream Cheese Icing

Go get it:

3 1/2 c. all-purpose flour

1/4 tsp. baking powder
2 tsp. baking soda
1 1/2 tsp. salt
1 tsp. each nutmeg, cloves, cinnamon
1 1/2 c. each granulated sugar and packed brown sugar
1 c. oil
1 3/4 c. pureed pumpkin or one 15 oz. can pumpkin
4 eggs
1 c.  nuts (optional)

Icing

1 cup powdered sugar
1 tsp. vanilla
milk or water


Go make it:

1. Sift together flour, baking powder, baking soda, salt and spices. Add the sugars, mixing well.

2. Mix dry ingredients with the oil and pumpkin, stirring until well combined.
3. Add eggs, one at a time, blending thoroughly. Pour into 2 greased and floured 9 1/2 x 5 1/4-inch loaf pans.
4. Bake at 350 degrees for 50 to 60 minutes or until tester comes out clean. Cool for 5 minutes. Remove from pans. Place on wire rack to cool.
5. Make icing. Add water/milk until you reach desired consistency. Pour over bread once fully cooled or it will all melt and pool at the bottom of your loaf and not stay on top where it belongs. 


Roasted Pumpkin Seeds

Go get it:

3 cups fresh pumpkin seeds

4 cups water
3 teaspoons salt
1 tablespoons olive oil
1/4 teaspoons paprika

Go make it:

Heat oven to 350 degrees F. Place pumpkin seeds, water, and 2 teaspoons of salt in a large saucepan and bring to a boil for 15 minutes. Drain seeds, blot dry, and toss with olive oil, paprika, and remaining teaspoon of salt. Spread the seeds in a single layer on a nonstick baking pan; roast until lightly golden and crisp -- about 30 minutes. Store in the freezer for freshest taste.

What's your favorite savory or sweet pumpkin recipe? I'd love to share your recipes here. :)

Sunday, October 3, 2010

How does your garden grow? Part 28: Harvesting and planting garlic.

Garlic is a member of the allium family. These include onions, shallots and leeks. The cloves are the seeds. The bulb grows underground and the leaves grow up above. Garlic is easy to grow so let's get started.

You can get your garlic bulbs from popular gardening companies like Burpee or Gurney's. Some say you can just use the kind you get from your grocery store, but I have yet to try that. Each bulb can contain up to 20 cloves depending on the variety. One clove will produce another whole bulb. What an easy way to save seeds! You can and should use your own harvested garlic cloves to plant again in the fall. After harvesting your garlic let it dry for a few weeks. The easiest way to dry garlic bulbs is to tie the leaves together, hang in a dry, cool spot to air dry. After garlic is dry gently clean off dirt and separate cloves from the bulb.

To plant garlic pick a spot where your garlic will get full sun and in well drained soil. Plant individual cloves in an upright position about 4 to 6 inches apart, one inch below the ground. Some say it is traditional to plant garlic on the shortest day of the year. In northern climates (this is all you NEWbies!) the best time is after the first hard frost. This could be anywhere from October through November. If you fear that your garlic will be damaged by too cold of a winter (usually caused by lack of snow cover) you can cover your garlic with straw or leaves.

You will know, come spring, if your garlic has grown properly if you see green shoots sprouting above ground. If not you still can try your hand at planting spring garlic. This works the exact same as fall planting, but your bulbs probably will be smaller come harvest time. Garlic is ready to harvest when the leaves turn brown and look dead. This is your heads up that the garlic is ready to come out of the ground.

This is a real easy, self-sustaining plant that I love to grow and hope you will try it out. I bet you never buy it from the store again. Enjoy!

Sunday, September 26, 2010

How does your garden grow? Part 27: Apples apples apples!

I went apple picking with my dad the other day and now it is time for all things apples. Mmm. First up is my crock pot (slow cooker) apple sauce recipe.

Crock Pot Applesauce

Go get it:

15 to 20 medium sized firm apples in sweet varieties. I like Golden Delicious, Cortland, Gala, Empire and Connell Red. This ensures a nice consistency and sweetness to your sauce.

Sugar or Splenda to taste (not always needed)

cinnamon to taste

water or apple juice

Go make it:

1. If using a food mill you will not have to core or peel your apples. Just cut into chunks and place into crock pot. The food mill will catch all your seeds and stuff you aren't going to want in your sauce. A food mill will create a very smooth consistency so if chunky is your thing you may want to take the long road. You will need to core, peel and cut up apples prior to putting them in the crock pot.
2. Add cinnamon (I like a lot so I use 1 tablespoon) and sugar/Splenda (I like only a little so I use about 1/4 cup or less). Mix well so the apples are coated. Some like to add cinnamon toward the end of the cook time because they feel the cinnamon loses it's potency. I'll let you decide.
3. Add about 1/4 cup of water or apple juice.
4. Turn crock pot to low and cook for anywhere between 5-8 hours depending on how big or small you cut up your apples. Check their doneness every so often just to be safe.
5. When sauce is ready to your liking, mash with a spoon or potato smasher (only if you peeled and cored apples first) to get a chunky consistency. Use an emulsion blender (only with peeled and cored apples) for a smooth consistency or a food mill. If using a food mill just run the sauce through the food mill while it sits on top of  a bowl to catch the sauce. Get rid of the peels and seeds every so often.
6. Place applesauce into containers of choice and freeze. Also can be processed in a hot water bath. Process 15 minutes for pints and 20 minutes for quarts. Make sure jars have sealed. Any unsealed jars need to be refrigerated. Enjoy!

I make this applesauce every year. Have fun with it. Try fun additions like maple syrup or other spices.


Nana's Apple Cake (Thanks Copykat Recipes and a big shout out to Stephanie!)

Go get it:

1/2 cup shortening


2 cups sugar

2 eggs

2 tsp vanilla

2 cups flour

1 tsp. baking soda

1 tsp. baking powder

1 tsp. salt

1 tsp. cinnamon

1 tsp. nutmeg or mace

1 tsp. ginger

6 cups peeled, diced tart apples
 
Go make it:
 
Cream shortening and sugar. Add eggs and vanilla. Combine dry ingredients and add to mixture. Stir in apples. Spoon into greased 11 x 13 pan. Bake at 350 for 45-50 minutes or until the toothpick comes out clean. Cook time may vary so really check the doneness before removing from oven. Recipe may be cut in half and cooked in an 8x8 pan. This is amazing all by itself, but even better served warm with some vanilla bean ice cream.
 
I would love to hear any of your go to recipes for apples. I love apple anything and everything. It really is Fall when I bust out the apple recipes. I might as well enjoy it.

Sunday, September 19, 2010

How does your garden grow? Part 26: Ready to winter over your flowers?

More like how does your garden stop growing? LOL. My Geraniums are definitely on their way out. I haven't had the heart to put them in the garage and start their ugly looking process toward next year's pretty flowers. Today I finnally got the courage. My rule is that I cannot put up my fall decor much less the Halloweeny stuff until my flowers go inside. What? Don't red and pink Geraniums go with orange pumpkins?

Geraniums are pretty hardy so they could handle a light frost, but not most other flowers. Like my Begonia should come in very soon, but it is still outside because it is so pretty. Well, that and it's yellow and orange. :) Remember this little guy? He was the tiny, hardly noticeable pot in this picture on my post about wintering over your flowers. Actually, it's only half of the plant. One of my tubers broke right after it established good new growth. So this is really only one of two Begonias.

First, you should place your pots in the basement or garage before a frost. Then remove the excess dead stuff. After about a week put them down your basement (if you had them in the garage) in large enough garbage bags. Keep them right in their pots. Read more here. This saves lots of money each year. Try it out.

Sunday, September 12, 2010

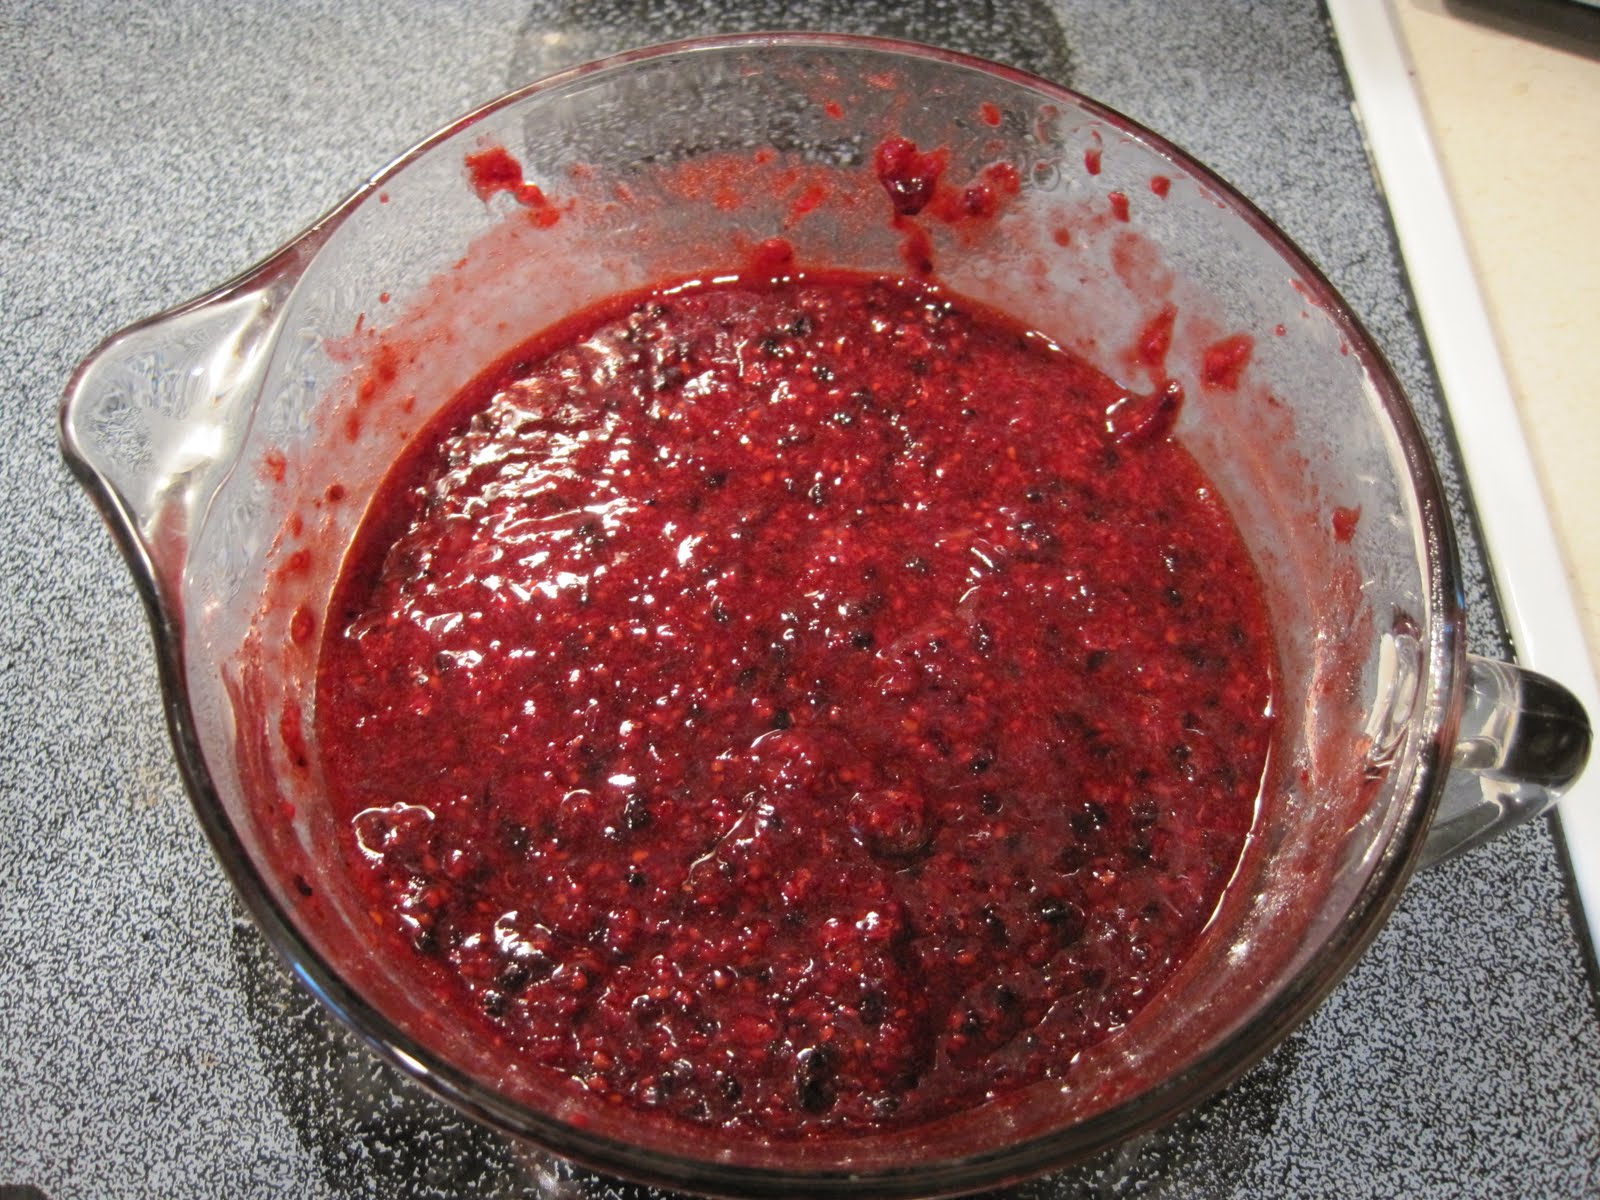
How does your garden grow? Part 25: Raspberry Blackberry Freezer Jam recipe.

My raspberry bushes are in full swing again. No complaints here. I had enough frozen and fresh to make some jam. I thought a good combo would be to add blackberries. Those I did not grow. This recipe is very similar to the Strawberry Rhubarb Jam I made earlier this summer.

Go get it:

First you gather your ingredients. You will need enough fruit to equal 4 cups. This is 4 cups of mashed fruit. Trust me, 4 cups of whole raspberries is a whole lot different than 4 cups of mashed. You don't have to cook the berries. This is the best part about freezer jam. For the most part no cooking. This makes the jam taste fresh picked and saves a lot of the good for you stuff in them.


4 cups of mashed raspberries/blackberries
1 1/2 cups sugar or Splenda (I used 1/2 Splenda and 1/2 sugar)
1 packet Ball Instant Fruit Pectin
6 eight oz. containers to store your jam in. 

Go make it:

1. Mix your sugar and pectin in a medium size bowl.  
2. Add mashed fruit to sugar mixture. Mix well.

3. Spoon mixture into your containers leaving a little head space (room for expansion).


Let mixture set for 30 minutes before putting into your fridge or freezer. If freezing you can keep these about a year. If putting into the fridge you can keep this about 3 weeks.

Sunday, September 5, 2010

How does your garden grow? Part 23 and 24: More yummy garden recipes!

I'm giving you more than one this week due to the missing post last Sunday. My internet was down and I didn't think Monday could handle a gardening post. He's kind of lazy and just likes to enter contests so you see. Here are a few of my favorite things to make. I'm using fresh garlic (oh garden grown garlic to sooo much better than the store bought stuff and super easy to grow) for the Garlic Garlic copycat recipe. For my Beer Bread recipe I'm going to show you how to quickly make your own self rising flour for those of you who don't keep it on hand. Did she just say Beer Bread?! Yuppers. And for my taco meat recipe I'm whipping up a homemade seasoning similar to the fajita sasoning.


Taco Seasoning
Go get it:

2 lbs. lean ground beef/chuck (You can substitute ground turkey too.)

2 tablespoons corn starch (You can use flour in a pinch too.)
6 teaspoons chili powder
1 teaspoon onion powder
1 teaspoon garlic powder
1/2 teaspoon seasoning salt
1 teaspoon paprika
1/2 teaspoon cumin
1/2 teaspoon garlic salt
1/2 teaspoon sugar
1 teaspoon instant minced onion
1 teaspoon beef bouillon

Go make it:

Brown beef in a large skillet. Drain off fat. While meat is cooking mix all seasonings together well (I like to use a pestle to get any dried chunks all mixed in.) When beef is browned add seasoning and 1 cup of water. Mix well. Bring to a boil. Once boiling turn down heat and simmer until thick. Since this is a homemade recipe I like to let it cook about 15 to 20 minutes to get the flavors absorbed into the meat. Serve like usual on top of nachos, inside crunchy or soft taco shells. Add your favorite topping like lettuce, tomaotes and jalapenos from your garden (we did!). Maybe some sour cream, cheese and guac. Oh yeh and lots of hot sauce. :) Enjoy.


Beer Bread
Go get it:

3 cups self rising flour (If you do not have SR flour you can make it by using all purpose flour with 1 1/4 teaspoons baking powder and 1/8 teaspoon salt per cup you are putting together.)
12 oz. beer (not light beer!) or apple juice
1/2 cup sugar ( I would reduce this if using juice.)
3 tablespoons melted butter

Go make it:
1. Preheat oven to 350 degrees F. Add flour to bowl (and baking powder/salt if making your own). Add sugar and mix well. Now crack open that beer. You know it's too early to drink so just add it to the bowl. Bottoms up. Start mixing on a low speed. I'm using the dough hook, but could have totally gotten away with using the paddle.
2. Take a spatula and really get the bottom mixed up. You know how hard it is to get the bottom of the bowl mixed up when you have a Kitchen Aid stand mixer. Mix on low until it is all good to go. Dough will be very sticky.

3. Pour into a greased loaf pan. Bake for about an hour. Better check it early just in case. I do not advise you to double this recipe in one bowl. Unless you have extra tickets to the gun show for me. Even my stand mixer has a hard time. I learned my lesson in the past. Serve warm if you can't wait or cut into cubes and serve with Garlic Garlic Dip for a yummy appetizer (Or meal in my case lol.).


Garlic Garlic Dip
Go get it:

1 Tbsp. granulated garlic

1 Tbsp. garlic salt
4 to 6 cloves of garlic minced (I advise you to use fresh as jarred will offer a different taste, but play around.)
1 Tbsp. minced onion flakes
1/2 cup mayo (I have used light in this recipe.)
1/2 cup sour cream (I have used light in this recipe.)

1. Mix all dry ingredients together well.


2. Add minced garlic (See my cool garlic press up there?! You don't even have to peel it. The 3rd picture is the leftover peeling you discard after it has been pressed.), mayo and sour cream. Mix well. Refrigerate at least 4 hours, but over night is recommended. Serve with Beer Bread, crackers or pretzels. I have also used this as a base for potato salad.

Thursday, August 26, 2010

Oh boy oh boy oh boy. Raspberries round two.

Look what I grabbed out of my garden just now. Mmm. I can't help, but go grab something every time I walk past. Today it was a handful of raspberries. I am lucky enough to have the twice bearing bushes. Sometimes they fake me out and give me a third small batch. They are so good to me. Do I feel another jam recipe coming? Maybe :)

Sunday, August 22, 2010

How does your garden grow? Part 23: Salsa recipe for canning.


This is my first attempt canning salsa. I make fresh salsa all the time. I really could live on chips and salsa alone. Really. I stumbled across a recipe that a bazillion people raved about and then tweaked it to my liking. Here goes.
Go get it:
8 cups tomatoes, peeled (blanched), chopped and drained

2 1/2 cups chopped onion
1 1/2 cups chopped green pepper
2 chopped jalapenos (1 seeded)
2 chopped serrano (1 seeded)
2 chopped chili peppers
10 cloves minced garlic
1 tsp cumin
2 tsp fresh ground pepper
1/8 cup canning salt
1/2 cup chopped fresh cilantro
1/8 cup sugar
1/4 cup red wine vinegar
1/4 cup cider vinegar
1/4 cup white vinegar
1/4 cup lime juice
16 oz. tomato sauce (I used homemade, but store bought is fine)
12 oz tomato paste

1.) Heat a big pot full of water to just a boil. Rinse tomatoes. Cut an x on bottom of tomatoes. Get the biggest bowl you own and fill it full of ice. Add water to create an ice bath for your tomatoes. Put a few tomatoes in pot at a time for about 1 minute or until skins start to peel back. You will see the skins are peeling back for easy removal. Place tomatoes in ice bath to stop the cooking process.

2. After all the tomatoes are cool enough to touch peel them. Remove the seeds. Great items to add to your compost pile. Chop tomatoes and place in a colander in your sink to drain.

3. Add all the rest of your ingredients to a big pot. Stir well. Add the chopped tomatoes. Bring to a boil. Cook 10 minutes. Taste to see if you need more of anything.


4. In your canning pot sterilize the jars. Keep them hot until you fill them. The last couple of minutes put the lids in the hot water. Do not boil them, though. When ready fill the hot jars with your yummy salsa. Leave a 1/2 inch of headspace. Use a wet towel to dampen the clean rim of the jar so the lid stays in place. Place the lid on and and the band. The bands should just be just finger tight.

5. After the lids and bands are on the jars place them in your canning pot and process for 15 minutes. Make sure there's plenty of water covering the lids. After 15 minutes remove jars and cool. Test them to see if they have sealed. You will even hear the popping of the lid on most of your jars. Any jars that did not seal need to be refrigerated. Oh darn, you'll just have to eat those. :)

Your salsa should be kept in a dark, cool spot. Your university extension offers great tips and recipes. Here is the UW Extension website. The great thing about these sites are that they are updated yearly so everyone stays safe. It doesn't matter how organic and how tasty your canned goods are if safety measures aren't taken. I would enjoy it if you shared your favorite preserving tips and recipes. I love sharing recipes and things I make with friends, family and neighbors. Happy canning!

Monday, August 16, 2010

How does your garden grow? Part 22: Fajita recipe.

My garden is producing many types of peppers right now. I am growing Jalapeno, Serrano, Bell and Chili Peppers this time around. I use peppers for many things. I eat them in salads, on pizza (both fresh and dried), with dip, on nachos, and the list goes on. One of my favorite ways to eat them is in fajitas. Here is a great easy recipe. If you are really trying to channel Julia Child you can even make your tortillas. I make them and and get a lot of oos and ahhs. Easy peasy too.

1 tablespoon cornstarch
2 teaspoons chili powder
1 teaspoon salt
1 teaspoon paprika
1 teaspoon sugar
3/4 teaspoon crushed bouillon (chicken, beef or vegetable depending)
1/2 teaspoon onion powder
1 tablespoon granulated garlic (garlic powder will do just fine)
1/4 teaspoon cayenne pepper
1/4 teaspoon cumin

1 lb. protein of choice (chicken, beef or what have you)
1-2 tablespoons oil
onions and peppers in the amount your stomach desires (we shoot for 1 large onion and about a 1/2 lb. peppers)
1/2 to 3/4 cup water
tortillas (Try making them. Just once. I promise you'll be sold!)

Mix first 10 ingredients (all of the dry ones) in a small bowl. Cut up meat. Brown meat in a little oil on medium heat. Stir every so often. While meat is cooking cut up onions and peppers.  After meat has cooked a few minutes add your peppers and onions. Add the fajita seasoning and water. Stir well. If you like your veggies very well done and super tender cook for a few minutes stirring often before you bring to a boil. If you like them pretty firm immediately bring your fajita mixture to a boil after adding the water and seasoning. Boil for one minute and remove from heat. You can always cook the veggies longer, but don't let your meat get too done or it may make for some tough eats. This is why some like to remove the meat after a bit and then continue to cook the veggies. Sauce will thicken upon standing. Enjoy with your favorite toppings rolled into a warm tortilla. Mmm.

*If you don't have bouillon you can skip the water and substitute chicken/beef/vegetable stock instead. Please feel free to alter the spicy according to your taste buds. Also, have you noticed I like to skip mentioning things like measurements and equipment. I am so sorry if you have never cooked before and don't know some of these things that I take for granted. If I ever confuse you so much just leave me a comment. Don't be afraid to ask and I won't be afraid to answer ;)

Monday, August 9, 2010

I'm in love. With my garden that is.

Oh look at what I got! I had to share this with you. I just wish I had a better camera. Sigh. My garden is in full swing and this is my first Organic Beefsteak Tomato that I got to pick. This is a big one. His little sidekick is on the smaller side, but just as nice. Funny how I make my pots of flowers into girls and my tomato plants into boys. I love eating tomatoes with salt and pepper right after I pick them from my garden. Still warm from the sun. Wow, I should write a poem about my tomato. Kidding!

On a side note, I have to get this off my chest. I am totally super duper jealous of magical growing seasons that can get tomatoes months before I can. Damn you zone 5a. I guess patience is a virtue, right? Still doesn't cure my zone envy.

Sunday, August 8, 2010

How does your garden grow? Part 21: Late summer gardening.

Is it really the end of summer? I pretend it's summer until my Halloween decor clashes with my still blooming Geraniums. Is that wrong of me? I have a hard time letting go of summer every year. Well, since summer is still in full swing at my house here's what is on my to do list.

Water water water. Toward the end of summer the plants are completing their life cycle. This means that they have practically sucked every last drop of nutrients from the soil in which they live. The soil at the end of summer loses moisture rapidly. This is where you come in. You don't want your tomatoes to slow down on producing just when they are getting into their groove. I use soaker hoses. The cheapest ones I can find. Free is even better. Check Craigslist or Freecycle. Your garden/plants need a deep soak every few days this late in the season.

Feed. August is a great month to add more fertilizer. Or, heck, even your first dose could happen now. At this point in time the nutrients are pretty much depleted. I am constantly dumping my coffee grounds, eggshells, etc. into my garden. You can also find local fertilizer too. Doesn't hurt to ask around or search online.

Cut it back. You will be surprised how many plants you can practically cut back to half of its original size. I once had a Verbena that tipped over one too many times and then dried up a little too much. Well I nursed it and nursed it and fed it and fed it and it just was too mad at me to work it out on her own. So I was told to cut it back to less than half its size. That scared the pants off of me to do, but it worked. It was like a new start for this flower. Also, keep deadheading your flowers. They appreciate this very much. When you don't deadhead your blooming plant thinks it needs to start the reproductive cycle of going to seed. Instead of putting its energy into producing more flowers it produces seeds. You should not deadhead Mums anymore at this point so they their buds.

Plant some more! Like you don't already have your work cut out for you doing what you've been doing great all spring and summer long. Now I'm telling you to go plant more?! What's wrong with me? Ha ha. No, really. Go plant some seeds for plants that are all done. Like lettuce, radish, beets and spinach. They can handle a frost. Lettuce is easy to cover in case of a frost. I have not tried, but the Brassicas family (think Cauliflower, Broccoli, Brussel Sprouts and Cabbage) does well this time of year too and hold up quite well after a frost. You could probably find some plants for almost free at garden centers. Peonies are best planted during late summer and early fall. Garlic also needs to be planted in fall. Best you wait until closer to first frost.

There is still a lot of summer left and loads of work to be done. Pretty soon we will be making salsa, stewing tomatoes and picking pumpkins. What else do you do to your garden or yard toward the end of summer?

Sunday, August 1, 2010

How does your garden grow? Part 20: Saving tomato seeds.


Instead of buying more tomato seeds next year I am hoping I can successfully save mine from this crop. Hopefully is the key word here. I know I can save hybrid seeds, but cannot guarantee the outcome. I know I can easily save my organic tomato seeds too. Here are a couple different techniques. I'm not sure I know which one I want to go with yet.

Here is a great short little video about saving tomato seeds using the fermentation technique. The author is Clifton Middleton.

Here is another great step by step tutorial without fermentation.

You can also go with the just set it and forget it method. Leave the seeds in their respective gel and dry on a paper plate, towel or wax paper. It's just harder to separate the seeds when planting time comes around. Remember-yellow is good-green is bad.

I also seem to think that wasting a perfectly good tomato for the sole purpose of taking it's seeds is absurd. :) Eat it first! It may be a chore to remove the little sections of gel/seeds, but who wouldn't want to eat the mater first? You could even just...long pause for added effect....spit out the seeds while eating.

 This will be my first year saving vegetable seeds. In years past I always saved flower seeds. I wonder why I didn't save vegetable seeds. Hmm. I think it's because I've always had volunteer plants. In addition to the regular volunteers this year (due to my compost pile) I got volunteer pumpkins. Really big :)! I'm not even sure what kind they are.

Do you have a great method for saving tomato seeds? Please feel free to share. Thanks!

Sunday, July 25, 2010

How does your garden grow? Part 19: Creamy Cucumber recipe.


It's cucumber time! Are your cukes ready? I've got all shapes and sizes. As you can see from the picture above. :) I love to eat cukes fresh out of the garden. Usually in a salad or plain with salt and pepper. Sometimes I run out of ideas. Today I am going to share with you a recipe that makes a great side dish for a BBQ or any summer dinner.


Creamy Cucumbers

Go get it:

3-5 medium or small cucumbers
2 Tablespoon sugar (or more to taste)
1 teaspoon salt (or more to taste)
White vinegar
1/2 teaspoon dried dill (fresh works too if you have it on hand)
1/2 teaspoon pepper
1 cup sour cream
onion (optional)


Go make it:

Slice cucumbers very thin. I used a mandolione. Works like a charm. Just don't slice your fingers.

Place in a bowl and sprinkle sugar and salt over top. Mix well. Add enough vinegar to cover them. Let sit for 15 to 20 minutes.
Now drain all of the vinegar off. Make sure you get every last drop or your creamy cucumbers will be soupy. Add sour cream, onion, pepper and dill. Mix well. Refrigerate until well chilled.
Enjoy!