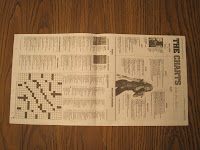
Now if you read my blog I bet you have tons of newspapers lying around every week. Do you use coupons?! Do you get the Sunday paper or many Sunday papers? How did I guess??? Well what are you waiting for? Go get 'em!
Start with one single sheet of newspaper. Try not to use the really colorful stuff. I can't say for sure if the colored ink is any worse for you than the black, but my brain keeps making a connection between all the dyes we should try not to eat. If I have organic soil and organic seeds, I guess I should shy away from the funnies....
You should fold it in half the long way so it looks like that up there.
Ooo you are so good at this! Now go find your preferred cylindrical object of choice. Wowsers that was a fun word you don't get to bust out too often. I chose my favorite stainless steel Bodum travel mug. It has a base of about 2" and worked like a charm. You can use anything. Bottle of IZZE. Can of Pam. Water bottle. A drinking glass. You name it. It's okay too if it's skinnier, say a can of IZZE :) It will just be harder to put dirt in later. I guess you could make a funnel out of newspaper since you'll be in such a DIY state of mind anyway. Put the creased end of newspaper toward the top/mouth of chosen object.
Roll the newspaper around chosen object. Leave yourself a couple of inches hanging over. Turn it over. Now the creased side should be on the bottom now. You see this is really only to make it more stable. It's okay if you didn't bother to pay attention. I only came to this realization half way through my project. And they look all uniform and neat. Anyhoo, smush down the paper flush with the bottom of your object until it's as flat as you can get it. It will sit all well behaved once there is dirt in it.
You'll end up with something like this. I hope. It's a lot harder to explain than it is to execute. Trust me.
See how it's nice and flat on the bottom. This one was cooperating very nicely. Some of his friends were not. I'm not sure why, but these last two pictures have been rotated by some higher power. I wouldn't have picked these angles, but maybe that's why I wasn't an art major. I tried to get them back to their original positions, but it is what it is.
When you are finished it should look like this little guy. Fill with dirt. Plant your seeds. Place on a waterproof tray. When you water them be careful not to keep them drenched. Only water after they are pretty dry or mold may be an issue. And keep in a well ventilated area. These dry out fast so make sure they are touching each other. This helps spread the water love. So if Bodum's (I named him after the Bodum coffee mug I used!) buddy is really thirsty next to him, Bodum will share his drink of water with him through osmosis!? Okay, not really, but it was worth a shot. Not a science major either! The best part is these little newspaper pots will decompose right in the ground. No transplanting! I am hoping these last until I need to plant them in my garden. I did them a little early so I could show you what I was up to. Let me know if you already do this or if this is your first attempt.


No comments:
Post a Comment